In the last couple of years, Advent Calendars have evolved from pictured doors, to crappy chocolate, to good chocolate, to toys, to beer... you get the idea.
I am not a huge fan of the crappy chocolate. Mostly because I have to expend way too much early morning energy just to keep *someone* from eating it, at least until they've downed a piece of toast for 24 whole days. That, and if it's good chocolate, it's likely supposed to be shared, which also presents a problem in this house.
This year, I go back to work on Dec 1. Our daycare is out of commission until January 1, so my mom is helping us out. This is a HUGE job, with my two kids for one person! To help keep them busy, I have been building some ideas to make an activity calendar for the month. I thought I would share 24 days of advent links and ideas because most of them came from my craft cupboard, Value Village, and the Dollar Store. I promise you, I spent 20$ max on this whole extravaganza. Some of these activities I know will be used again and again! I have them each in a bag (no fancy wrapping over here, though you could to up the *wow* factor).
December 1: A bag of used Hot Wheels, and a roll of masking tape. He will LOVE the new cars! Thanks VV.
http://3littlerascals.tumblr.com/post/13617648525/masking-tape-roads
December 2: The Three Little Pigs, reenacted. 3 plastic pigs, a wolf, a bag of straw, some collected sticks, some lego bricks, and the book.
http://thismummaslife.com/2013/11/05/three-little-pigs-playdough/
December 3: Book: Corduroy's First Christmas (a fav. from growing up)- Thanks Value Village for the 1$ brand new book!
December 4: Beads and Pipe cleaners: Christmas snowflakes for the tree. I love to have an ornament that the kids have made each year.
http://kids.baristanet.com/2011/01/ask-holly-beaded-snowflakes/
December 5: DVD from Value Village: Rudolph the Red Nosed Reindeer
December 6: Glass jars, Modge Podge and food colouring. Candle Holders? Gift Jars?
http://handsonaswegrow.com/how-to-tint-mason-jars/
December 7: Sugar Cookies to decorate
December 8: DIY Farm scene for the train table: Felt roads, pond and green pasture plus dollar store animals.
http://mommyknows.com/felt-play-mat-tutorial-sort-of/
Decmber 9: Book: Usborne pirate flap book (VV $1- I KNOW, I seriously hit the jackpot!)
December 10: Cotton ball Snowman finger puppets
http://handsonaswegrow.com/winter-craft-snowman-puppets/
December 11: Foam Decorated Gingerbread men
December 12: Train Tracks for the wooden set with embellishments
To give credit, here's the blog, but it's in Spanish! You get the idea from the picture. I also made grass ones.
http://systraseidur.blogspot.ca/2011/09/innblastur-i-rigningunni.html
December 13: Graham Cracker Gingerbread houses
http://www.wikihow.com/Make-Gingerbread-Houses-Using-Graham-Crackers
December 14: DIY Construction site: A tote full of fish tank rocks, larger rocks, nuts, bolts and other odds and ends, and a set of small construction vehicles from Value Village.
http://crabandfish.blogspot.ca/2012/09/minidiy-pint-sized-construction-site.html
December 15: Book: Twas the Night Before Christmas (VV)
December 16: Popsicle stick Christmas trees and other shapes
http://thewhoot.com.au/whoot-news/crafty-corner/popsicle-stick-art-ideas
December 17: Mini Marshmallow snowmen
http://happyhomefairy.com/2011/01/12/winter-craft-marshmallow-snowman/
December 18: (I will likely have to swap this for a day when it actually snows). Spray bottles full of coloured water, for snow paint.
Please tell me that this one doesn't need instructions.
December 19: Salt Dough Ornaments
http://hivingout.blogspot.ca/2010/11/salt-dough-ornaments.html
December 20: Lace and Trace decorate stockings and blowing bubbles
http://rp010.k12.sd.us/Classroom%20Themes/christmas_around_the_world.htm
December 21: Plastic dinos to replace the farm animal scene. Pleistoscene to make props for the play table.
http://www.creativeplayhouse.mumsinjersey.co.uk/2013/02/dinosaur-small-world.html
** Also, do a dino ice excavation !
If you have seen this one before, this link is worth a look. It explores different ways of extracting the dinos for little hands!!
http://littlebinsforlittlehands.com/icy-dinosaur-excavation-sensory-play/
December 22: Painting and decorating Christmas trees with pompoms
http://www.fantasticfunandlearning.com/pom-pom-painting-christmas-tree-craft-for-toddlers.html
December 23: DIY Fizzy bathtub paints
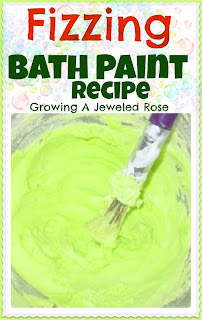
http://www.growingajeweledrose.com/2012/12/fizzing-bath-paint-recipe.html
December 24: Supplies to write a special letter to Santa, and The Grinch DVD
http://www.aletter4santa.com/
Many of these sites out there; still have some time to look around and see what might be the best.
Lots of great activities for throughout the year; Hope there are some in there for everyone!
What do you want to stand for? I am a mother and wife, but I choose to stand for more. I am a long distance runner, working hard to find time to fit in "me" activities that make me feel good about my WHOLE self! This is my journey, as I strive for balance in all things important to me.
Tuesday, November 18, 2014
Home Made Chicken Bouillon
One of the perks of having young kids is finding time when you least expect it!
A couple of weeks back, I was super excited to hit a great 50% off sale at Superstore on a lot of their organic items. I picked up a number of boxes of Organic, Non GMO, No MSG chicken stock.
Well. I brought it home and my oldest broke out in his famous MSG rash. As per my routine I checked the box. Of course. Yeast Extract.
A quick little lesson here- MSG, for those of you with sensitivities, comes with about 20 different names. Yeast Extract is probably the most obvious and one that seems to be the worst for my family. Once again, I was angry because although I consider myself to be pretty diligent when it comes to package labels, I got blinded by the marketing and forgot to read the ingredients.
If seemingly the healthiest store bought bouillon had MSG, must be time to make my own!
It's amazingly simple.
Step 1- Save chicken/turkey bones as you get them (I just ziploc them all in the freezer). Better yet, cook a whole chicken and then just boil up the leftovers at the end.
Step 2- Add approx 4L of water, one onion chopped, 2 celery stalks chopped, 2 carrots chopped, fresh thyme, parsley, salt, pepper.
Step 3- Simmer on the stove.
* You can stop here, and use the stock for a soup if you wish... or:
Step 4: Reduce until it is thick and most of the water has evaporated- approx 1-2 hours.
Step 5: You can cool and skim off the fat if you like. Then, line a baking tray with wax paper and pour the liquid into the tray. Let set in the fridge. Mine was still a little loose (probably should've boiled off a bit more water), so I threw it in the freezer for about 15 minutes, cut into squares, threw into a ziploc, and now I have chicken bouillon all ready to use!
I read somewhere that it would store for 6 mos, but I know mine will be gone before that point!
Wednesday, November 5, 2014
Rainy Day Fun
It is SO easy to turn on the TV on a day like today- misery outside our widows with high winds and pelting rain- oh... and no car today! We usually do in the morning for a little while, when I get organized, but I have to be careful that the morning tube doesn't drag on, and on, and ON!
My best defense on days like this is a plan.
Today's plan was to make new play dough. As I was doing a quick google search for my fav. playdough recipe, I came across another post about reinventing playdough play by assembling some of your kids' favourite items.
So... I quickly made the play dough (if you haven't made your own, here is the super awesome easy recipe I use all the time in my kindergarten class):
http://theimaginationtree.com/2012/04/best-ever-no-cook-play-dough-recipe.html
Here are the things I grabbed. SUCCESS! So much so in fact that he's still singing me Happy Birthday (to me) and it's been 40 minutes. This doesn't sound like much, but in my house it's a world record by about ... 30 minutes in the play dough realm!
What do your kids love to do with play dough?
What other free/cheap rainy day "go to" activities are your favourites?
Tuesday, November 4, 2014
The Stuff That Clutters Our Lives- Giving Meaningful and Purposeful Gifts
There is a lot of STUFF in my house, and sometimes, it really bugs me. Especially when the "stuff" is mainly a large pile of toys.
I am not really about accumulating things, or wealth. I am about relationships and living happily. Blog... balance... you get the idea.
We celebrated a huge and wonderful birthday here... my oldest boy just turned 4! The excitement in his little body was not able to be contained. He was joyful just to BE four.
When asked what he thought his birthday would be about, he suggested it might include extra kisses from mommy and daddy. Well. Pat ourselves on the back a little ... we are doing something right here! That's a wish I will try and fulfill every day of his little life.
I watched all day as he marveled at the small things. Being a new number. Getting to eat a cupcake for breakfast. Having his little besties coming out to celebrate with him at gymnastics. Several weeks later, it's still in his mind- the best day of his life. To him, at 4, this is what matters! He is a relationship kid, through and through.
He enjoyed opening the presents. He was SO grateful for each one he received. I don't ever want him to lose that gratitude, or have it replaced with entitlement! I was relieved that he LOVED his low budget present from us: A dress up box FULL of recycled clothes/costumes (Thank you Halloween for being just around the corner).
In fact, he has played in them every day since. Again, patting myself on the back here because I am nurturing in my child a couple of great things.
1) Imaginative play
2) Play with others (although I am a little tired of being Batman)
3) Creativity and versatility.
Enough bragging.
I'm sharing with you a great article (lots out there right now) that I found that talks about gifts you can give that take on more meaning. Some of them are toys... (yes, there are those toys that are played with again and again and dearly loved) I thought it had some really balanced and realistic ideas, rather than swinging to the extreme!
Gifts and Ideas For Clutter Free Giving
(Great website and FB page by the way: http://frugalfun4boys.com/ ... although it's ideas definitely do not have to be so gender specific!)... digressing again...
A law that quite applies to toys: The Law of Diminishing Returns. In a nutshell how it applies to happiness:
WHEN YOU HAVE A LOT OF STUFF, OWNING MORE OF STUFF WILL NOT MAKE YOU HAPPIER!
So true. Some toys are great for a day or two when they are new... then often forgotten.
I am seeking ways to apply this more often in our adult lives also. Meaningful, thoughtful gifts, or necessary needs. Looking for ways to value our time and relationship over money and goods. Frankly, I am tired of shopping as a hobby rather than a necessity. Giving *things* often isn't as gratifying as those gifts that have some heart or elbow grease involved. I have other things I would rather fill my time with.
I sometimes feel guilty that my second child rarely gets a new toy, new clothes, new anything. Then I remind myself that that newness, and buying him things does not satisfy him. He is happy with what he has! It's to satisfy some need within me. He does not yet know about all things being equal between brothers. For those reasons I will restrain myself from getting him any *stuff* that he does not truly need. Sorry little man. You are stuck playing with the 1001 toys that big brother already owns, that are so fascinating to you for now. It's a hard life I know!
Well, perhaps the hard part is always being told to leave them alone!
Saturday, November 1, 2014
Meal Planning: Linked Recipes For the Next Few Months!
I'm on a bit of a mission.
Returning to work is hanging over my head, and there are some things that I want to have wrapped up neatly before then- one of them was a "plan" for eating. I recall all too well, getting home from work just too tired to come up with some elaborate dinner plan.
I also tried asking my husband "What do you want to eat this week?" to make a meal plan. Have you ever asked your husband that? Here's what I get: "Food".
Anyway, I assembled what might be realistic for us. It looks good on paper, so it is a bit of an experiment to see how it plays out. I imagine I'll be tweaking it each week. Maybe if I think about it, I'll write about how we did at the end of the month.
I do stockpile a bit in my pantry, but my plan is to write out the things needed for each week and have them all in one note (on my phone) so that if something is on sale and coming up in the next couple of weeks, I can grab it when it's on sale.
I've linked almost every meal to my recipes. Turns out pretty much everything I follow in a cookbook also exists online (who knew?).
My plan is to look at the week, if it looks good, grocery shop from the recipes. If not, do some re-arranging to make it work.
A word about my cooking:
I have tried and regularly use 98% of these recipes. I didn't just randomly copy them from the internet. They are all linked, but mostly to the same recipes I use online or in my cook books.
I don't use mixes. I make from scratch.
I don't usually do bought salad dressing or sauces. They are VERY easy to make; I have linked where I thought about it.
Google Doc of Meal Planning Calendars (November and December). Download and modify as you like!
Here are the two completed calendars:
My plan is to print them for quick reference as well as have them accessible on my phone so I can look quickly if need be.
NOVEMBER:
DECEMBER:
Returning to work is hanging over my head, and there are some things that I want to have wrapped up neatly before then- one of them was a "plan" for eating. I recall all too well, getting home from work just too tired to come up with some elaborate dinner plan.
I also tried asking my husband "What do you want to eat this week?" to make a meal plan. Have you ever asked your husband that? Here's what I get: "Food".
Anyway, I assembled what might be realistic for us. It looks good on paper, so it is a bit of an experiment to see how it plays out. I imagine I'll be tweaking it each week. Maybe if I think about it, I'll write about how we did at the end of the month.
I do stockpile a bit in my pantry, but my plan is to write out the things needed for each week and have them all in one note (on my phone) so that if something is on sale and coming up in the next couple of weeks, I can grab it when it's on sale.
I've linked almost every meal to my recipes. Turns out pretty much everything I follow in a cookbook also exists online (who knew?).
My plan is to look at the week, if it looks good, grocery shop from the recipes. If not, do some re-arranging to make it work.
A word about my cooking:
I have tried and regularly use 98% of these recipes. I didn't just randomly copy them from the internet. They are all linked, but mostly to the same recipes I use online or in my cook books.
I don't use mixes. I make from scratch.
I don't usually do bought salad dressing or sauces. They are VERY easy to make; I have linked where I thought about it.
Google Doc of Meal Planning Calendars (November and December). Download and modify as you like!
Here are the two completed calendars:
My plan is to print them for quick reference as well as have them accessible on my phone so I can look quickly if need be.
NOVEMBER:
SUNDAY
|
MONDAY
|
TUESDAY
|
WEDNESDAY
|
THURSDAY
|
FRIDAY
|
SATURDAY
|
1
|
||||||
And Fried Rice
Make Bread
Make German Chocolate Cake
|
3
Birthday dinner!
|
4
|
5
|
6
Chicken pesto
pasta
Make and freeze extra pesto
|
7
Salmon
|
8
|
9
Corn
chowder and biscuits
Make Bread
|
10
Hamburgers and salad
|
11
Summit
salad (Whitewater) with Dijon
chicken
|
12
Fajitas (beef)
|
13
Pad Thai
(Whitewater) |
14
(Make 6 extra for freezer)
|
15
Home made Sushi night
|
16
Thai
Coconut curry soup (Whitewater) and gyoza (leftover frozen)
Make Bread
|
17
Wild rice pilaf
|
18
Make Cookies for freezer- Cosmic
cookies
|
19
|
20
Creamy Bean
Burritos
|
21
Chicken Alfredo
Alfredo sauce **sub
milk for cream
|
22
Home Made Pizzas
|
23
Make Bread
|
24
Out for dinner
|
25
Slow cooker
Honey Chicken with rice
|
26
Steak and potatoes
and green salad
(Whitewater)
|
27
Smoked salmon Pasta with basil, tomatoes,
onions, artichokes and feta
|
28
|
29
|
DECEMBER:
SUNDAY
|
MONDAY
|
TUESDAY
|
WEDNESDAY
|
THURSDAY
|
FRIDAY
|
SATURDAY
|
Nov
30
Make
Bread
|
1
Chicken
Pot pies ( from freezer)
|
2
Use
Frozen Spaghetti sauce-
Pasta
dinner
|
3
Steak,
potatoes, greek salad
|
4
Tex
mex Spaghetti squash (home made salsa, feta, cheddar, black beans, bread cru)
|
5
Chicken wings
|
6
Craft
night??
|
7
Make
Bread
Roast
Beef Dinner
|
8
Leftover
Roast beef
stirfry
|
9
|
10
|
11
|
12
|
13
(Whitewater)
|
14
Make
Bread
|
15
|
16 **
Chicken Pot pies (from freezer- see nov.
calendar for recipe)
|
17 **
Hamburgers
|
18
Thai Chicken
noodle salad
|
19
Breakfast
dinner- sausage, hash, pancakes
|
20
Deep
fryer night!
Wings,
gyoza, fries
|
21
Make
Bread
Leftover
Chili
|
22
|
23
|
24
|
25
Christmas-
Turkey Dinner
|
26
Leftovers!
|
27
Holiday
Cooking
Make
Turkey Soup
And biscuits
|
28
|
29
Turkey
Pot pie
|
30
Lettuce Wraps
and Gyoza
|
31
Dinner
Out
|
Thursday, October 30, 2014
Barn Door Project Complete!
Remember this?
It's finally time! The biggest Pintrest project to date that I have roped my husband into, has finally been completed!
When we bought our house 3 1/2 years ago, I knew that adding a second child to our family would eventually make it awkward to have guests; our spare room would disappear. I had visions of putting doors on our front (largely unused) room.
After a lot of research and budget restrictions, I temporarily gave up. Although framed in for french doors, the layout of the room doesn't allow for it; it would have to be a slider of some sort.
Well. Barn door project here I come! Too bad the idea of spending 700$ on a track was NOT in the plans.
Enter Pinterest, and the idea of DIY hardware too! I came up with these technical and elaborate plans:
My door was a double door, so keep that in mind when eyeing the pictures.
Here is what I did! The WHOLE project was under $200, including all of the materials listed! I probably could have spent a little less with a smaller can of stain and if I had researched some alternate places to buy some of the materials
Supplies:
2 pieces 6ft steel track
1 piece 4 ft steel track (cut to make hangers)
4 pulleys, pulled apart to use the wheels
1 4 ft length of aluminum tubing,, cut to space the track from the wall
4 bolts long enough to go through the pulleys and the steel, with washers and nuts
8 bolts to go through metal and doors
10- 3 3/4 inch hex bolts with washers, for the track to the wall.
Wood- opted for tongue and groove pine 1x6. I used 12 pieces, and 3 -1x4 for cross pieces.
Wood Glue
Wood stain (optional)
Spray paint (optional) for black hardware
Cordless Drill
Drill bits
Grinder
Pipe cutter
Sponge for stain
Husband.
Yup. Not hard, but I needed a bit of man strength (not to mention expertise) as I am not exactly practical when it comes to these projects! He was super thrilled to be a part of this, can you tell?
Door Hangers- bend, then cut the hangers. We used a vice to do this as well as a hammer (and husband strength). Tip: we actually put the casing for the pulley wheel inside the hook to keep it the right size and shape.
We used a 2 1/2 inch pulley wheel. Worked well.
Decide on desired length, drill two holes in the lower portion where the hangers will be bolted to the doors.
Doors: Assemble Tongue and groove to desired width. Wood glue as necessary. Attach Cross Pieces. Stain/Paint to desired finish.
Note: I trusted the wood glue when it said stain would adhere to it. The wood glue lied!
Track: Decide on desired distance from the wall. We had to clear the door moulding .Cut enough tubing to surround each bold to the desired distance. (the tubing acts as the spacer between the track and the wall).
Find studs, mark placement on Track to drill holes. NOTE: Drill the holes in the lower half of the bar, so that there is enough room for the wheel to roll along the track without getting hung up on the bolt.
We mounted the track before painted to make sure that everything was in order.
Paint: If desired, spray all hardware black. (note that the lag bolts and tubing that went from the track to the wall were also sprayed... apparently forgot that in the picture).
Mount the track to the wall.
Hang hangers, decide on placement on doors, and mark where to drill for the bolts.
Mount hangers to the doors, hang doors. Done!
I'm really happy with how it turned out, and the fact that my front play room/guest space now has some privacy! The doors do not take away from the size of the room when opened or interfere with anything. The only thing left to do is construct a door stop for the ends of the track (L bracket perhaps) and maybe a little hook at the bottom to prevent kiddies from swinging the doors.
Happy to answer any questions about how it was done. All of the supplies were available at Home Hardware. Pretty excited about this one!
It's finally time! The biggest Pintrest project to date that I have roped my husband into, has finally been completed!
When we bought our house 3 1/2 years ago, I knew that adding a second child to our family would eventually make it awkward to have guests; our spare room would disappear. I had visions of putting doors on our front (largely unused) room.
After a lot of research and budget restrictions, I temporarily gave up. Although framed in for french doors, the layout of the room doesn't allow for it; it would have to be a slider of some sort.
Well. Barn door project here I come! Too bad the idea of spending 700$ on a track was NOT in the plans.
Enter Pinterest, and the idea of DIY hardware too! I came up with these technical and elaborate plans:
My door was a double door, so keep that in mind when eyeing the pictures.
Here is what I did! The WHOLE project was under $200, including all of the materials listed! I probably could have spent a little less with a smaller can of stain and if I had researched some alternate places to buy some of the materials
Supplies:
2 pieces 6ft steel track
1 piece 4 ft steel track (cut to make hangers)
4 pulleys, pulled apart to use the wheels
1 4 ft length of aluminum tubing,, cut to space the track from the wall
4 bolts long enough to go through the pulleys and the steel, with washers and nuts
8 bolts to go through metal and doors
10- 3 3/4 inch hex bolts with washers, for the track to the wall.
Wood- opted for tongue and groove pine 1x6. I used 12 pieces, and 3 -1x4 for cross pieces.
Wood Glue
Wood stain (optional)
Spray paint (optional) for black hardware
Cordless Drill
Drill bits
Grinder
Pipe cutter
Sponge for stain
Husband.
Yup. Not hard, but I needed a bit of man strength (not to mention expertise) as I am not exactly practical when it comes to these projects! He was super thrilled to be a part of this, can you tell?
Door Hangers- bend, then cut the hangers. We used a vice to do this as well as a hammer (and husband strength). Tip: we actually put the casing for the pulley wheel inside the hook to keep it the right size and shape.
Drill the holes for the bolts through the wheels. We (keep in mind anything technical that says "we" actually implies my husband did it and I watched) used a drill press, but a cordless drill and a good bit work too.
Here are the pulleys that we pulled the wheel out of:We used a 2 1/2 inch pulley wheel. Worked well.
Doors: Assemble Tongue and groove to desired width. Wood glue as necessary. Attach Cross Pieces. Stain/Paint to desired finish.
Note: I trusted the wood glue when it said stain would adhere to it. The wood glue lied!
Track: Decide on desired distance from the wall. We had to clear the door moulding .Cut enough tubing to surround each bold to the desired distance. (the tubing acts as the spacer between the track and the wall).
Find studs, mark placement on Track to drill holes. NOTE: Drill the holes in the lower half of the bar, so that there is enough room for the wheel to roll along the track without getting hung up on the bolt.
We mounted the track before painted to make sure that everything was in order.
Paint: If desired, spray all hardware black. (note that the lag bolts and tubing that went from the track to the wall were also sprayed... apparently forgot that in the picture).
Mount the track to the wall.
Hang hangers, decide on placement on doors, and mark where to drill for the bolts.
Mount hangers to the doors, hang doors. Done!
I'm really happy with how it turned out, and the fact that my front play room/guest space now has some privacy! The doors do not take away from the size of the room when opened or interfere with anything. The only thing left to do is construct a door stop for the ends of the track (L bracket perhaps) and maybe a little hook at the bottom to prevent kiddies from swinging the doors.
Happy to answer any questions about how it was done. All of the supplies were available at Home Hardware. Pretty excited about this one!
Monday, October 27, 2014
In the Books! Rock 'n' Roll Vancouver Half Marathon Revelations
We get to the start line. Nervous as always, my, husband, friend and I make jokes about the things we hate in these races. The loud breather, the gear girl, the over confident runner, the people who choose to run in the middle and start to walk with no warning. I am nervous for no reason, as per usual.
Off goes the gun. I realize that there is no clock at the start, I am going to have NO IDEA how fast I'm going, as my husband is wearing the Garmin. I also have no clue when I crossed the start line, as per the wave start. I hit my pace music, and hope for the best.
Looking back at my times, I am AMAZED at how well using music that matched my cadence worked! Probably better than the watch ever would have. Check out my times. They are pretty consistent. I even impressed myself! (Check out a little more about using your cadence for speed here if you want)
I was looking forward to some awesome music and crowds as we ran. I lost all faith when we reached the top of the hill and there was a lady standing on stage singing a lullaby by herself. REALLY?? RnR Vancouver, where did you find these people? I gave up and turned up my music.
It was nice to have 9 water stations. To honour my dad, I took a GU for my pocket (hey it was free!) even though I had no intention of using it. I had a good laugh and a couple of flashbacks at the finish line as Lane and I stuffed juice boxes, granola bars and various other snacks into our pockets for the road. My sisters will appreciate the familiarity of this scene.
At about 14km, things always get a bit tough. Tired legs, achey body. Right around that time, a boy, about 12 goes by with his dad. My eyes filled up with tears, as I remember so many times being that kid beside my own dad. That dad and the boy probably have no idea of the memories or habits they are creating, but I do. I think it's pretty special. Of course, then I got salt in my eye and spent the next km trying get rid of the sting and watch the road.
I hit the 18km mark and realize I am going to make it, but there will be no sprint to the finish. I cross, and know that despite not having a watch, I gave this race pretty much everything I had. Of course I had no idea what that meant until my sister texted me 20 minutes later to say "Wow! Congrats on your time!"... uh... What was it!?! Turns out I pulled a 2:01:58! I did cut my time by 4 minutes from my last run. Either way, I was pretty proud to be doing this post 2 babies. Time and body wise I am so happy to be where I am today. 4 minutes faster than I anticipated!
Which by the way, leads me to my sister. She also ran, and killed it! Under 1:50 for her first time in years. She attributed her success to cross training and improving her stamina in the pool. She is an inspiration, reminding me that great improvements are always possible .
A quick assessment post race said I fueled my body properly: lots of water, lots of clean carbs. As a result I was rewarded with a time to be proud of. Carb loading seemed to pay off at least to some extent!
The mama's training schedule I posted worked really well for me. I missed a couple of runs, but nothing major. It felt like my previous running base really allowed me to run a couple times a week plus a long run and still have a successful finish.
Rock and Roll Vancouver. The post event concert was nice, but I have no idea who these dudes even were (do you???) and I love my music. Well organized, good turnout, but not as FUN as I had hoped. Sadly, it may be my first and last attendance at this event.
This run marks something bigger as it always does. Pushing myself to do something for me. Pushing myself to do something better than I have done in a long time. Not a personal best, but a personal best post kids and post 10 years! I am still very proud.
Running for me leads to self reflection which leads to thankfulness. I am thankful to my husband who supported me and ran also, knowing that running is not his favourite activity. He continues to be such a big support to me in so many ways. I am thankful for my in-laws who took on our busy kids for a LONG and busy morning to let us have a stress free one. I am thankful for the weather. I am thankful that I was able to obey the funniest sign I saw in both senses:
Most of all I am thankful for my life, body and health, and the balance that those things bring to me. I don't need Thanksgiving to remember these things... I need running.
I am hopeful that one day it will be my boys running beside me, and I will know what it means, for now and for later. I do this for my fitness, but also for them. I want to be healthy to keep up with them. I never want to be sitting at home, left out of the activities because I chose not to take care of my body. Most of all, I am thankful I once again got myself into all of this nonsense to remind myself of all that is good about my life, and that I can achieve my goals.
BUT, dang you 2 hour mark for staring me in the face and taunting me just a little. SOOO close!!
Subscribe to:
Posts (Atom)